
Einmalige Anmeldung
-
- Was ist Single Sign-on?
- How do I set up single sign-on (SSO) with HelpDesk ?
- How do I configure my HelpDesk account for SSO?
- Wie kann ich SSO für meine Benutzer aktivieren?
- Ist es möglich, ein SSO-Profil zu löschen?
- Wie kann ich SSO für einen Benutzer deaktivieren?
- Can I configure my choice of identity provider for SSO?
Single Sign-on (SSO) is a one-step user authentication process. If you are the admin of a HelpDesk account, you can set up SSO with the identity providers (IdP) of your choice. Your technicians can access HelpDesk using the IdP credentials without another password to manage.
Admin of a HelpDesk account can configure SSO to access HelpDesk by signing in to a central identity provider. To set up SSO, you need to first configure your identity provider and then configure your HelpDesk account.
To configure SSO for your HelpDesk account,
- Login to HelpDesk via web browser.
- Click user icon the displayed on the top-right corner and click 'My Account'.
- Klicken Sie auf 'Single Sign-On'.
- Geben Sie einen Namen für Ihr SSO-Profil ein.
-
Enter the URLs and add the X.509 certificate received from your IdP.
Note: X.509 certificate should only be in .pem or .cer format.
-
Klicken Sie auf 'Single Sign-On konfigurieren'.
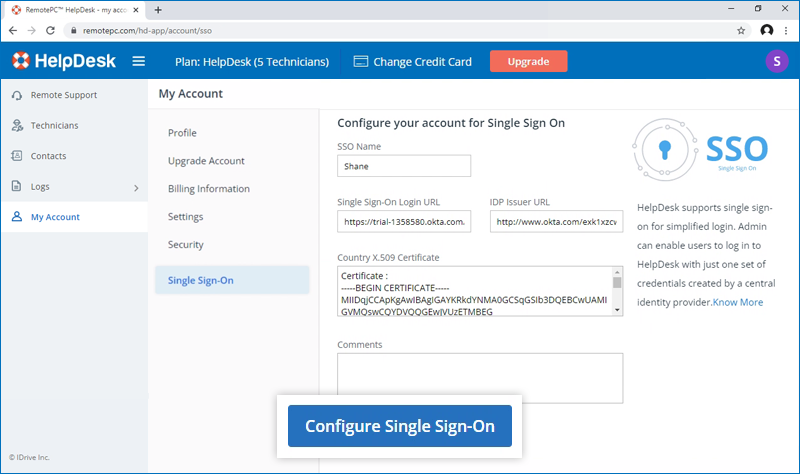
Sie erhalten eine E-Mail, wenn SSO aktiviert ist.
Admin of HelpDesk accounts can either select SSO for login while inviting technicians to create an account or enable SSO for existing technicians.
To invite technicians to use SSO,
- Log in to HelpDesk via web browser.
-
Go to the 'Technicians' tab and click 'Add'.
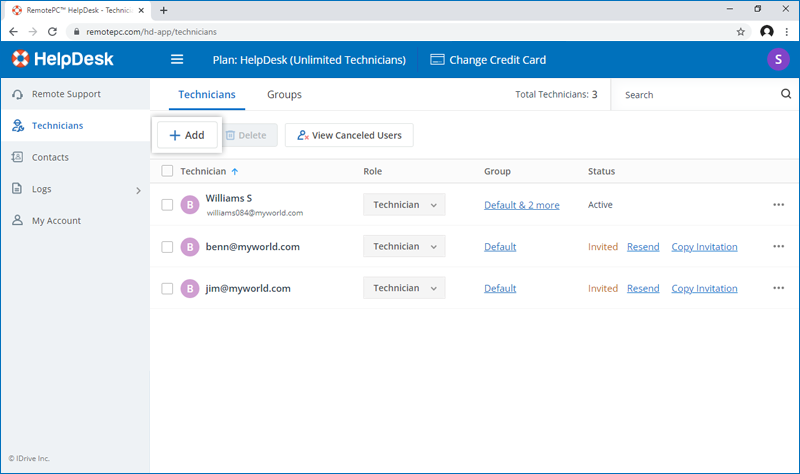
- Enter the email address in the 'Email Address' field.
- Select group and other preferences for the technician.
-
Wählen Sie "SSO aktivieren".
Note: If you select the checkbox, technicians won't have to set a password for their account.
-
Click 'Invite Users'.

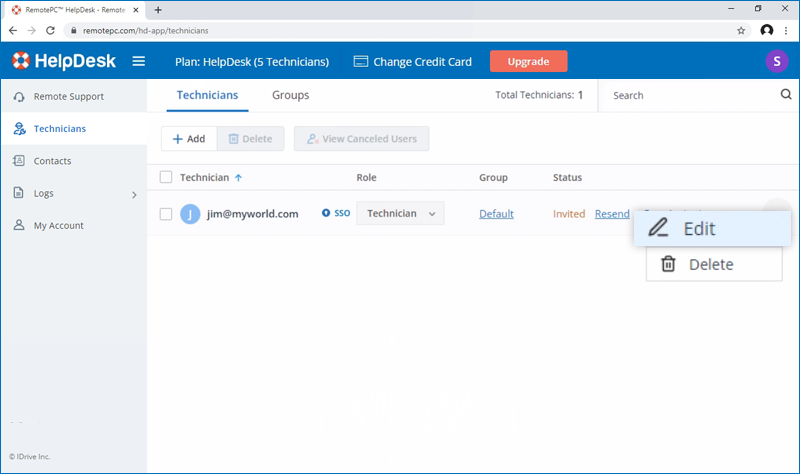
To enable SSO for existing technicians,
- Login to HelpDesk via web browser and go to the 'Technicians' tab.
-
Hover on the technician you want to edit and click
 and click ‘Edit’.
-
Wählen Sie "SSO aktivieren".

- Klicken Sie auf "Änderungen speichern".
Ja, Administratoren können ein SSO-Profil aus ihrem Konto entfernen.
So entfernen Sie das SSO-Profil,
- Login to HelpDesk via web browser.
- Click the user icon displayed on the top-right corner and click 'My Account'.
- Klicken Sie auf 'Single Sign-On'.
- Klicken Sie auf
 die dem SSO-Profil entspricht, das Sie löschen möchten.
 -
Click'Delete' in the confirmation popup to remove the SSO profile.
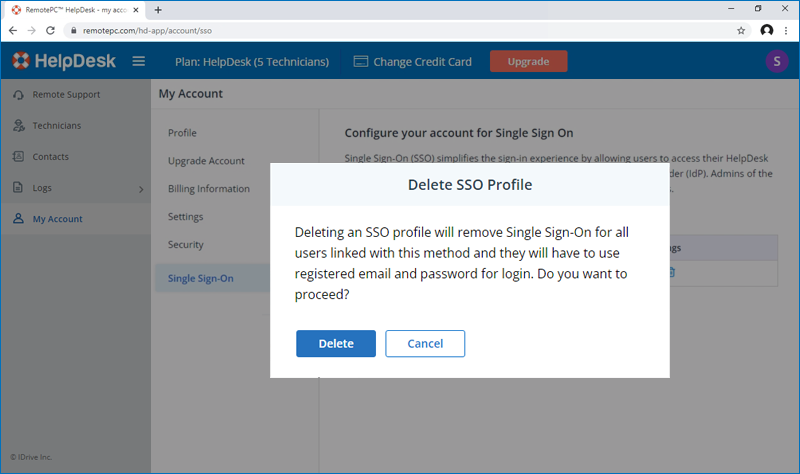
Deleting the SSO profile will remove Single Sign-On for all technicians linked with this profile and they will have to use their registered email and password for login.
To disable SSO for a technician,
- Login to HelpDesk via web browser and go to the 'Technicians' tab.
- Klicken Sie auf on the technician you want to disable SSO and click ‘Edit’.
- Deaktivieren Sie das Kontrollkästchen "SSO aktivieren".
- Klicken Sie auf "Speichern".
Wenn Sie das Single Sign-On für einen Benutzer deaktivieren, muss dieser ein neues Passwort für sein Konto festlegen. Danach muss sich der Benutzer mit seiner E-Mail-Adresse und seinem neuen Passwort anmelden.
Yes, you can configure your choice of identity provider for SSO along with a set of parameters as described below:
- HelpDesk uses SAML2 with the HTTP Redirect binding for HelpDesk to IdP and expects the HTTP Post binding for IdP to HelpDesk.
-
Verwenden Sie beim Konfigurieren mit SAML die folgenden URLs und speichern Sie die Änderungen.
- Audience URL (SP Entity ID):
https://sso.remotepc.com/helpdesk-api/user/sso/metadata - Single sign on URL:
https://sso.remotepc.com/helpdesk-api/user/sso/process
- Audience URL (SP Entity ID):
- Ihr Identitätsanbieter kann Sie fragen, ob Sie die SAML-Assertion, die SAML-Antwort oder beides signieren möchten.